iTerm2 Usage & Plugins
Install
Settings
Keyboard shortcuts
标签
新建标签:command + t
关闭标签:command + w
切��换标签:command + 数字 command + 左右方向键
切换全屏:command + enter
查找:command + f
分屏
垂直分屏:command + d

水平分屏:command + shift + d

切换屏幕:command + option + 方向键 command + [ 或 command + ]

查看历史命令:command + ;

查看剪贴板历史:command + shift + h
其他
清除当前行:ctrl + u

到行首:ctrl + a

到行尾:ctrl + e

前进后退:ctrl + f/b (相当于左右方向键)

上一条命令:ctrl + p

搜索命令历史:ctrl + r

删除当前光标的字符:ctrl + d

删除光标之前的字符:ctrl + h

删除光标之前的单词:ctrl + w

删除到文本末尾:ctrl + k

交换光标处文本:ctrl + t

清屏1:command + r

清屏2:ctrl + l
自带有哪些很实用的功能/快捷键
⌘ + 数字在各 tab 标签直接来回切换

选择即复制 + 鼠标中键粘贴,这个很实用

⌘ + f 所查找的内容会被自动复制

⌘ + d 横着分屏 / ⌘ + shift + d 竖着分屏

⌘ + r = clear,而且只是换到新一屏,不会想 clear 一样创建一个空屏

ctrl + u 清空当前行,无论光标在什么位置

输入开头命令后 按 ⌘ + ; 会自动列出输入过的命令

⌘ + shift + h 会列出剪切板历史
可以在 Preferences > keys 设置全局快捷键调出 iterm,这个也可以用过 Alfred 实现
常用的一些快捷键
⌘ + 1 / 2 左右 tab 之间来回切换,这个在 前面 已经介绍过了

⌘← / ⌘→ 到一行命令最左边/最右边 ,这个功能同 C+a / C+e

⌥← / ⌥→ 按单词前移/后移,相当与 C+f / C+b,其实这个功能在Iterm中已经预定义好了,⌥f / ⌥b,看个人习惯了
当然除了这些可以自定义的也不能忘了 linux 下那些好用的组合
C+a / C+e 这个几乎在哪都可以使用

C+p / !! 上一条命令

C+k 从光标处删至命令行尾 (本来 C+u 是删至命令行首,但iterm中是删掉整行)

C+w A+d 从光标处删至字首/尾

C+h C+d 删掉光标前后的自负

C+y 粘贴至光标后

C+r 搜索命令历史,这个较常用
Zsh
Install
brew install zsh zsh-completions
To set zsh as your default shell, execute the following for macOS High Sierra
chsh -s /bin/zsh
oh-my-zsh
sh -c "$(curl -fsSL https://raw.githubusercontent.com/robbyrussell/oh-my-zsh/master/tools/install.sh)"
Theme: pure
https://github.com/sindresorhus/pure
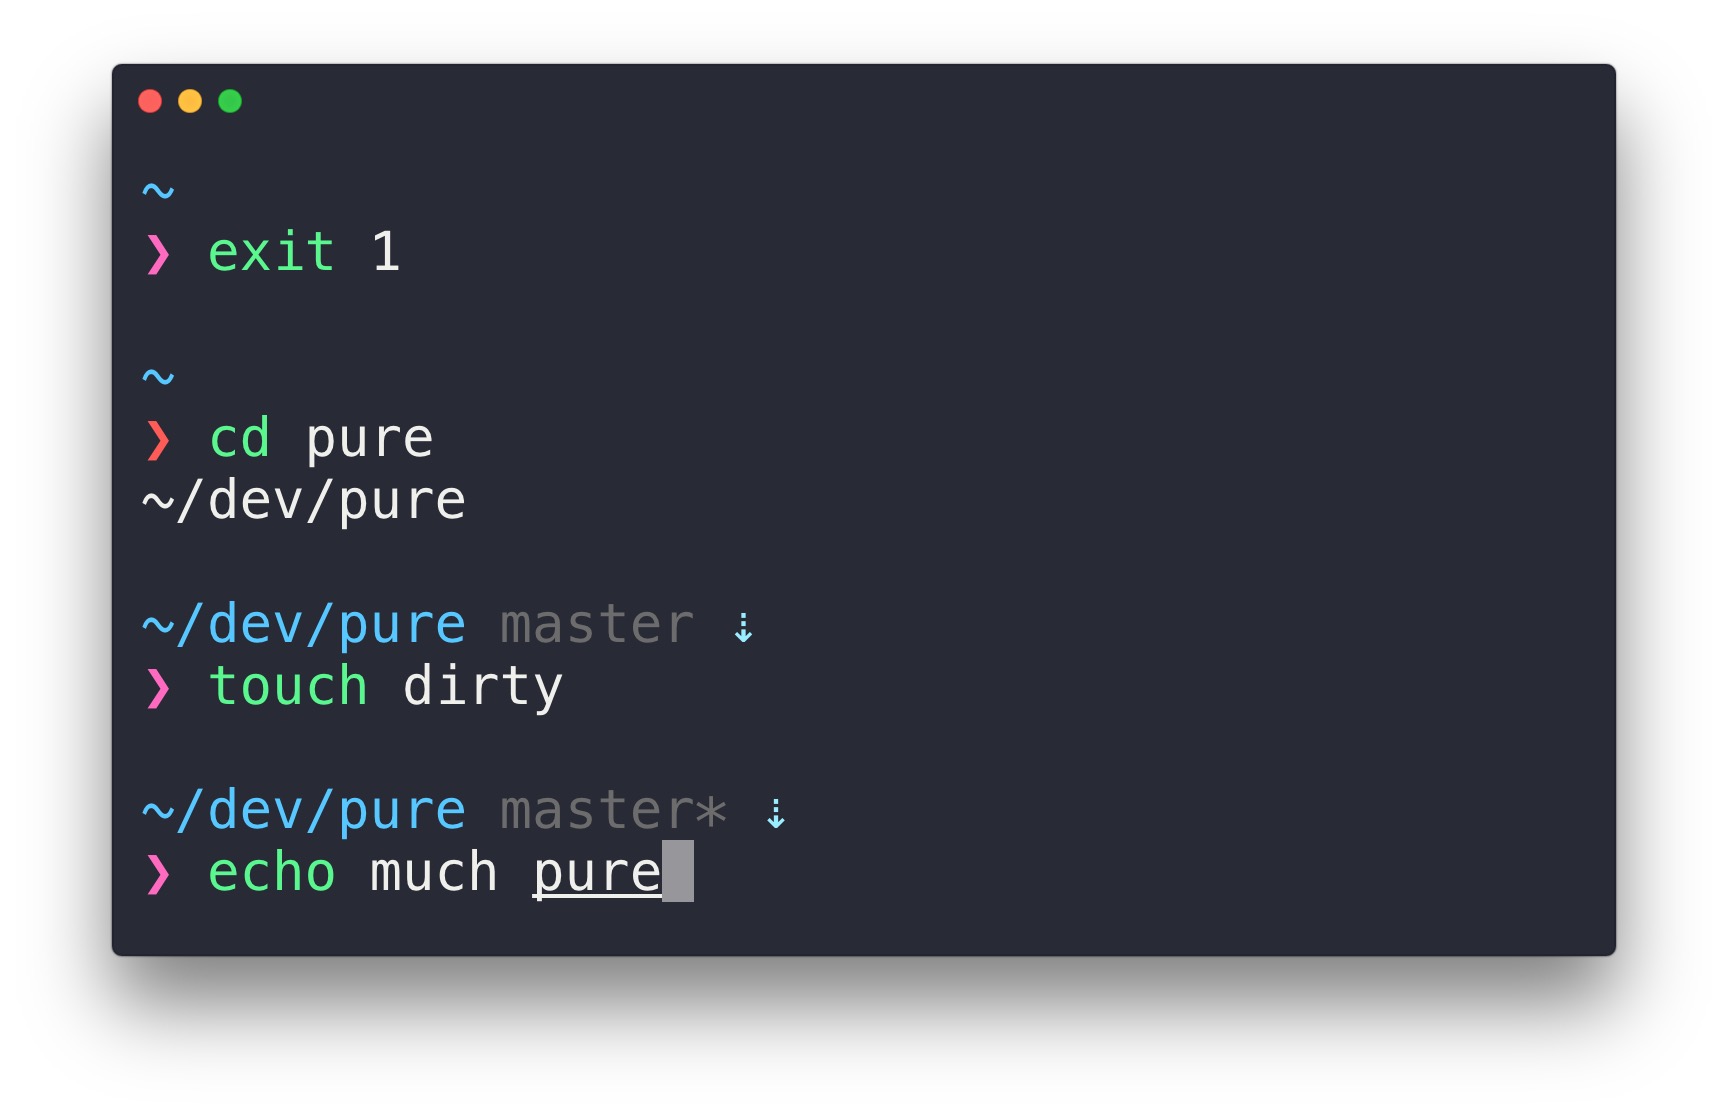
brew install pure
autoload -U promptinit; promptinit
prompt pure
Open via VSCode
code () { VSCODE_CWD="$PWD" open -n -b "com.microsoft.VSCode" --args $* ;}
PATH
Alias
alias szsh="source ~/.zshrc"
Plugins
autojump
autojump 是一个命令行工具,它允许你可以直接跳转到你喜爱的目录,而不用管你现在身在何处。
- 命令行安装:
brew install autojump
- 在用户目录下的
.zshrc文件中找到plugins=""这一行,设置为
plugins=(git autojump)
如果 .zshrc文件中没有这一行,则在文件的末尾添加
plugins=(git autojump)
- 在
.zshrc文件的末尾添加
[[ -s $(brew --prefix)/etc/profile.d/autojump.sh ]] && . $(brew --prefix)/etc/profile.d/autojump.sh
- 最后命令行输入
source ~/.zshrc使.zshrc文件生效。
- 假设你现在需要进入用户目录下的 Music 文件夹,可以使用
autojump Music或者j Music即可进入 Music 文件夹,但前提是要用 cd Music 进入 Music 文件夹一次,否则 autojump Music 或者 j Music 是无法生效的。 - autojump 有一个文件(里面存放着所有你去过的目录),你可以根据自己的情况,修改每一个路径权重(权重是根据你使用的频率决定)
thefuck
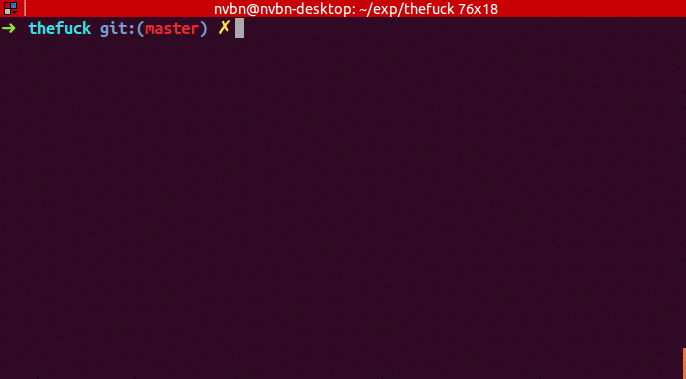
brew install thefuck
You should place this command in your .bash_profile, .bashrc, .zshrc or other startup script:
eval $(thefuck --alias)
# You can use whatever you want as an alias, like for Mondays:
eval $(thefuck --alias FUCK)
Changes will be available only in a new shell session. To make them available immediately, run source ~/.bashrc (or your shell config file like .zshrc.
If you want separate alias for running fixed command without confirmation you can use alias like:
alias fuck-it='export THEFUCK_REQUIRE_CONFIRMATION=False; fuck; export THEFUCK_REQUIRE_CONFIRMATION=True'
tree
mac 下默认是没有 tree 命令的,不过我们可以使用 find 命令模拟出 tree 命令的效果,如显示当前目录的 tree 的命令:
find . -print | sed -e 's;[^/]*/;|____;g;s;____|; |;g'
当然你也可以写一个别名来快速执行该命令,运行如下命令,将上面这个命令写到~/.bash_profile 里,以后直接运行 tree 命令就更方便了:
alias tree="find . -print | sed -e 's;[^/]*/;|____;g;s;____|; |;g'"
也可以使用 homebrew 安装 tree 命令行:
brew install tree
这样就在你的 mac 上安装了 tree 命令行了。